Archives

Posted on September 9, 2013

BareMinerals Get Started Kit

Beauty/ product review

bareminerals get started kit

Before I tell you about how much fun I had at the Dublin Fashion Festival, I think it’s fair to tell you a bit about Bellefbeauty‘s visit to BareMinerals and my a mini lesson on using the BareMinerals Get Started Kit (56-58 euros). Anyone who knows me personally would know that I am against drag makeup ,instead, I always strive for the most natural look possible. So if you’re anything like me (and even if you do enjoy the occasional drag makeup) you will find that this kit is still perfect for an everyday ”no makeup” look.

For those of you who are cosmetically challenged, worry not, because the BareMinerals Get Started Kit has everything you need, from the right brushes, to a ‘Get Started Guide Book’ that will truly help you master their signature Swirl, Tap, Buff makeup technique (which I’m very happy to have mastered myself)

bareMinerals GET STARTED kit

So what’s in the Get Started Kit and how do I use it?

  •  After cleansing and moisturizing your face, you can start off with the Prime Time Foundation Primer (As you know I’m quite liking Benefit’s POREfessional primer at the moment, so I will definitely have to do a comparison post to see which primer I prefer)
  • When that is all set and done, use your Full Flawless Face Brush to apply the  BareMinerals SPF foundation that you choose from 20 different shades and 3 different formulas (original, matte or ready formula) but of course if you pop into BareMinerals they can help you decide on what’s the best formula for your skin type!

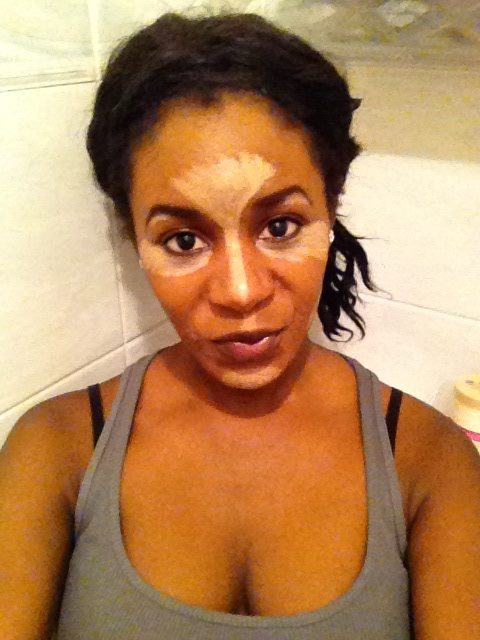
1.SWIRL a small amount of BareMinerals in the lid with the brush until it’s all tucked into the bristles. 2.TAP away any excess. There should be no visible bareMinerals on the outside of the brush. 3.BUFF bareMinerals onto the skin in a circular motion all over the face, concentrating on your forehead, cheeks, nose and chin.

  • Follow these instructions until you’re happy with the coverage you have built. If there are still some areas you would like to conceal, apply the Swirl, Tap, Buff technique but use the Max Concealer Cover Brush instead and apply to desired areas.
  • After that you can use the smaller Flawless Face Brush and apply the same Swirl, Tap, Buff technique to use the Warmth All-Over Face Color. Apply it in a 3 motion starting from the side of your forehead to under  your cheekbones and then backwards from the cheekbone to your jawline. This should add color to your face and give you a healthy sun-kissed glow.
  • Lastly, use your Full Flawless Face Brush to apply the Mineral Veil over your face in a circular motion. This will further absorb any oil and will keep your complexion fresh.

bareMinerals Gert started kit

The BareMinerals Get Started Kit is about all you need for a natural and healthy everyday look! After the lovely staff in BareMinerals were finished with me I felt so much more fresh and alive! Especially after they used LASH DOMINATION (which you all know I love!) 

What impressed me the most about the BareMinerals Get Started Kit is that you really only need a tiny bit of product followed by the Swirl, Tap, Buff technique to easily build the coverage you’re looking for. That aside, the Mineral veil that you apply at the very end to keep everything in place actually prevents the makeup from smudging (I witnessed it myself!!) so you no longer have to worry about wearing that pretty white blouse you’ve been dying to wear!

Have you picked up your BareMinerals Get Started Kit yet? If so, what are your favorite products so far, if not, what are you waiting for??? 🙂

Hope you’ve subscribed to Enhance What’s Yours Remember, Swirl, Tap and Buff ladies! 

Twitter   Facebook   Instagram

Posted on September 5, 2013

The Ultimate Girls Day Out Dublin 2013

Events

The Ultimate Girls Day Out

I should probably start by saying that it has been an eventful few days for Bellefbeauty (with more to come of course!) so for my next few posts I will be sharing with you the events that I attended this week, as well as the occasional banter of a few treats that I picked up along the way (has to be done!…..) So hope you’re ready for me to share my thoughts on The Ultimate Girls Day Out…….

The Ultimate Girls Day Out is the first fashion/beauty event show where Bellefbeauty made an appearance. Held at the RDS from 30th Aug – 1st Sept, The Ultimate Girls Day Out was a very promising event.We were all given the chance to browse through designer boutiques, get pampered with free beauty treatments and on top of all that, get discounted makeup products! (it doesn’t get any better than that!)

In case you didn’t know, I’m a bit eyebrow crazy, so I was delighted to get my hands on an eyebrow palette from Threads for less than half price! And If you love Bourjois (which I’m sure a lot of you do) then you would have been over the moon to see what kind of discounts they had over at their stand! I got these 5 lovely products for only 10 bobs!

The Ultimate girls day out

Now back to the Event…..

The Ultimate Girls Day Out is not only a fun day out, but it can also be a very educational one. From great beauty tips at the beauty zone to inspirational masterclasses at the smart girls zone,The Ultimate Girls Day out has something for every girl so whether you’re a fashion addict, beauty junkie, or book nerd, The Ultimate Girls Day Out can tailor to your needs!

If you’re an aspiring model, then The Ultimate Girls Day Out would have been perfect for you  to enter the Model Search competition and be named the face of Davey Davey hair salon!

Also, I think it’s fair to add that host Lorraine Keane did a wonderful job at introducing the models for the catwalk shows (yes there were catwalk shows!) not to mention her shoes/dress, which looked absolutely amazing!!

Now  if you didn’t attend The Ultimate Girls Day Out, don’t be too hard on yourself, it will be on again next year. Also, after I subscribed to U magazine I was given a nice little goodie bag with some lovely vouchers inside (we all love discounts!) and because I can be a little giving at times (I’m sure you know where I’m going with this ….) I’m giving you the chance to get your hands on the voucher of your choice!

the ultimate girls day out

All you have to do it like my Facebook page and follow me on Twitter! Whoever is the most engaging on each page gets their first pick at one of these lovely vouchers!

So if you’d like 20% off a beautiful dress from iClothing, 10% off beauty products at TheBeautyLounge or HerClutterBox, amazing discounts at House of Colour OR 10% off your next Threads treatment, then get liking/following!*

Did you attend The Ultimate Girls Day Out in Dublin this year, feel free to leave your thoughts below, would love to hear about your experience!

Hope you’ve subscribed to Enhance What’s Yours blog 🙂

Twitter   Facebook   Instagram

the ultimate girls day out

*House of Color and Threads offer are both flyers. All the others are vouchers with a code that can be used online

Posted on September 2, 2013

D.I.Y Honey & Lemon Face Mask

D.I.Y/ Natural beauty

honey & lemon face mask

I noticed that I got  a good bit of feedback from my first D.I.Y post on how to make a lip scrub, so I thought that it would be a good idea to do another quick D.I.Y post for you, so if you’re looking to lighten, tighten and brighten your face, keep reading and you will soon find that this honey & lemon face mask is the answer to your beauty prayers!

What you need:

Raw honey & Organic lemon juice (just a fancy way of saying squeeze the juice out of real lemons rather than getting ready made lemon juice!)

Why raw honey?

Honey is a natural antibacterial and anti-inflammatory so by using raw/organic honey in your face mask, you will benefit from all the nutrients that usually die due to excessive heat and pasteurization in non-organic honey.

It also absorbs impurities from the pores and the skin (No wonder ancient beauties used it with milk to keep their complexion looking young and radiant!)

And why would you ever want to put lemon on your face!!??

Here’s why…..

Lemon, lightens, tightens and brightens!!! Now to get more technical…. because of the lightening properties in lemon it is good for uneven skin tone. Not to mention that it’s good for exfoliating (important for any face mask!)

Now down to the nitty gritty…

Squeeze 1/2 a lemon into a bowl, add 2 tbsp of honey (organic/raw). Mix it with a spoon until it’s a liquid consistency. Apply it all over a clean face avoiding eye area.Leave on for 15-20 mins and rinse off. And it’s that simple!

Have you ever tried a honey and lemon face mask? 

Feel free to leave your comments below!

P.S. Don’t forget to subscribe to this blog to be in a chance to take part of my free giveaway! 

Twitter   Facebook   Instagram

Posted on August 28, 2013

Willow Water

Beauty/ Natural beauty/ product review/ Youthful Skin

willow water

If there is one thing that a great skin care regime needs, it’s plenty of water. But, why drink any old water when you can have one that has naturally occurring beautifying properties?

I couldn’t agree more!

Honestly, I find it hard to disagree with anything that’s good for you and also has beauty benefits,  because it really is a win win. So when nearly 20l of Willow Water was sent to me for review I couldn’t wait to get started to see how it works……

So how does it work?

Willow Water contains a unique blend of minerals which has been proven to be effective in beautifying the skin. The high levels of calcium and the salicin in the Willow Water (sourced from the salicin enriched willow tree) contain anti-flammatory properties which can improve your skins appearance.

Who did it work for?

2 in 3 women with dry skin at the start of the trial felt their skin condition had improved by the end of it
5 out of 6 women who considered their skin condition to be oily at the start of the trial reported improvements
Of those suffering acne prior to the trial, 3 out of 4 reported improvements

Did it work for me?

Honestly, I have yet to see improvements in my complexion or blemishes on my skin, but then again, that could be because I haven’t been drinking Willow Water for long enough to make a judgement. All of the other testimonies were taken up to 6 weeks after being introduced to Willow Water.

Final verdict?

I will continue to drink Willow Water, (not religiously though) because it actually tastes nicer than some water you can get! Also, I love the packaging (quite a sophisticated bottle for water some would say) so carrying 1.5l of Willow Water isn’t the least bit embarrassing!

If you want to find out more about Willow Water, and are interested in getting some for yourself check out their website below:

Home

P.S. Don’t forget to subscribe to this blog to be in a chance to take part of my free giveaway! 

Twitter   Facebook   Instagram

Posted on August 26, 2013

Maybelline GREAT LASH vs BareMinerals LASH DOMINATION

Beauty/ product review

mascara

If you read my first post on mascara (or eye lash growth for that matter), you would know that I’m big into thick and long eye lashes. So When I popped into BareMinerals to pick up a free sample of their LASH DOMINATION mascara I was chuffed, even though I had bought Maybelline mascara a few weeks beforehand!

I guess you can never had enough mascara in your makeup bag

BARE MINERALS LASH DOMINATION

I must admit, it was good thing I did pick up a sample of BareMinerals LASH DOMINATION,because if I hadn’t, I would be left with not so lengthening mascara.

Maybeline’s GREAT LASH mascara claims to have a precise lash building brush, but I honestly think that it really doesn’t give the same effect as the ”PROTWIST” 180 wand on LASH DOMINATION.

After only two coats of BareMinerals LASH DOMINATION I managed to get the desired effect.

   Bare Minerals LASH DOMINATIONAs you can see, BareMinerals LASH DOMINATION really    does add a lot of volume and colors to my eye lash here.    With only two coats, they looked fuller, darker and            longer and at only 20e, BareMineral LASH DOMINATION    offers a 10-in-1 lash benefits:

    1. Volume              6. Length

    2. Thickness        7.Mineral fortified

    3. Seperation           8. Smudge- free

    4. Lifts                       9. Clump-free

    5. All-day wear       10. Flake- free

maybelline great lash

Maybeline’s GREAT LASH on the other hand, does not  offer the same benefits!

In fact it doesn’t offer half of what LASH DOMINATION offers. I’m happy that I got a 30% discount on the day so it only came up to about  7 euros, but other than that this mascara only works for a daytime look, it just isn’t dramatic enough!

It’s not negative now, it does a great job at separating the lashes and making them look nice and healthy, but in terms of volume and thickness? This mascara was a miss for me!

Have you tried any of these two mascaras? If so feel free to share your thoughts below!

P.S. Don’t forget to subscribe to this blog to be in a chance to take part of my free giveaway! 

Hope you’ve had a chance to read this weeks post on stiletto nails on the Starlit Jewellery blog…

Twitter   Facebook   Instagram

Posted on August 23, 2013

Benefit: The POREfessional

Beauty/ product review

Benefit the POREfessional

Unfortunately for me (and any other person who has been cursed with sebum-prone skin), when it comes to maintaining a healthy look throughout the day, a little bit of extra care has to be taken into account. This can be particularly stressful on warm and summer days, so one of the ways to avoid a makeup meltdown (or any other type of meltdown) would be to use a face primer, or should I say Benefit: The POREfessional face primer. (34.50E)

Although it may seem a bit on the pricey end of things for such a small tube (22ml), the reason why I like the POREfessional face primer is because the product is highly concentrated, you really only need a pea size of it (maybe even less if you’re only applying it to your T-zone) so at the end of the day, you will get a good wear out of this product.

What Benefit say:

Quickly minimize the appearance of  pores with the POREfessional. apply this silky, lightweight formula to minimize the appearance of pores & fine lines for smoother-than-silk skin

What I say:

I think ”smoother-than-silk” is a bit of an oversell to be honest, nevertheless, the POREfessional really does do an amazing job at minimizing the appearance of pores (even without foundation!) So the fact that it can be worn before, after AND without any foundation at all is always a plus when you’re trying to keep it light during the summer!

Benefit POREfessional

  • Before foundation:The POREfessional creates a smooth and even canvas before you apply your foundation so it minimizes the appearance of pores and fine lines leaving you with a seamless finish.
  • After foundation:The POREfessional can be used during the day for a touch up in case your pores come out during hiding. (we don’t want that now do we!)
  • Without foundation:Because the POREfessional is quite mattifying, it is perfect for oil control (not to mention the Vitamin E derivative it contains which is known to protect skin from free radicals)

As you can see, the POREfessional has a bit of a beige color, but don’t be alarmed because after it is blended in it just leaves a smooth and mattifying finish.

Benefit POREfessional

There really is no reason why you shouldn’t at least give POREfessional a try….I know the name is a bit cheesy, but we’re all a bit guilty of being cheesy from time to time so get off your high horse and get shopping!

Have you tried Benefit’s POREfessional primer? if not, what are your favorite primers? 

P.S. Don’t forget to subscribe to this blog to be in a chance to take part of my free giveaway! 

Hope you’ve had a chance to read this weeks post on stiletto nails on the Starlit Jewellery blog…

Twitter   Facebook   Instagram

Posted on August 21, 2013

Gosh BB Skin Perfecting Kit

product review

gosh bb skin perfecting kit

If you’ve read my post on highlighting and contouring, you would know that I love the overall look achieved after sculpting and defining the face. So when I came across the Gosh BB Skin perfecting kit, it should be no surprise to you that I felt instantly drawn to it (with reason!)

At only 10.99, the Gosh BB Skin perfecting kit comes in two different shades: Light and Medium (as pictured above) The kit contains two concealers and one shimmering highlighter (which is fabulous)

How to use the Gosh BB skin perfecting kit:

1. Using your finger tips or a concealer brush, apply the lightest color concealer right under your eyes if you want to brighten up dark circles.

2. To cover up any other imperfections, mix the shades until you get the closest match to your skin tone.

3. And for my favorite step, use the highlighter under your brows and above your cheekbones for a fabulous finish!

 Remember: If you use a powder foundation, conceal first, if you use a liquid foundation, conceal after!

Now for my honest opinion:

Because I’d use the Gosh BB skin perfecting kit for a day look, I’m not too pushed on the pasty concealers that would normally be suited for a night time look. The highlighter however is a very close match to my skin tone (with a bit of a sparkle) so I found it perfect for enhancing the shape of my eye brows and for giving me higher raised cheek bones.

Normally I would use MAC prep + prime highlighter, but again, I’d rather use that for a night time look so the Gosh BB skin perfecting kit really saved me from using my MAC highlighter on a daily basis.

Have you used the Gosh BB skin perfecting kit yet? If so feel free to leave your thoughts and feedback below!

P.S. Don’t forget to subscribe to this blog to be in a chance to take part of my free giveaway! 

If you want to read another witty article, check out my post on stiletto nails on the Starlit Jewellery blog!

Twitter   Facebook   Instagram

Posted on August 19, 2013

Why should I use a highlighter?

Beauty
MAC highlighter

Mac prep+prime bright forecast

Personally I think that highlighters are a ”must have”  for anyone who is looking for that flawless finish because with such little effort, the right highlighter can give you that dewy look that will have people thinking you’ve just finished moisturizing your face (gotta love the makeup tricks!) so it really does baffle me when people ask

Why should I use a highlighter?

When applied correctly, a highlighter will change your beauty look enormously, even to the extent that it will have people wondering why you have a sudden glow (or an extra glow)

So in order to achieve that dewy look with a highlighter, you need to remember that there are three main areas that you should highlight:

1. The cheekbones/temples: when applying a highlighter to your cheekbones, try to blend it to the highest point of your cheek bone and the up toward your temple.

2. Eyes: when applying a highlighter around the eye area, remember to blend it under your brow bone to give your eye brows a lift when contouring.If you apply some highlighter to the inner crease of your eyes, it will open your eyes.

How-to-highlight-and-contour-

MAC Prep+Prime (Bright forecast)

3. Cupid’s bow: Applying highlighter to the cupid’s bow and just beneath your bottom lip will not only give you a healthy pout, but it will also give your lipstick a multi-dimensional color effect.

I also like to put some highlighter on the V area between my brows and at the bridge of my nose so if you’re going to do this, avoid applying too much highlighter to the very tip of your nose as the finish look will appear shiny rather than contoured.

Precautions:

– You can apply your highlighter after your foundation, but before your concealer.

– Always match the texture of your highlighter to your base i.e for liquid/cream foundation, use a creamy highlighter

-If you use a powder highlighter, always apply a thin layer of translucent powder over your foundation first.

Remember: If you want a naturally glowing look, the highlighter should blend in well with the foundation!

mac highlighter

Mac prep + prime bright forecast

I am currently using a MAC Prep+Prime Highlighter Pen, if you’d like me to review this product, feel free to comment below.

P.S. Don’t forget to subscribe to this blog to be in a chance to take part of my free giveaway! 

Twitter   Facebook   Instagram

Posted on August 12, 2013

How to have naturally long eye lashes

Eyes/ How To/ Natural beauty

how to have naturally long eye lashes

I must admit that I am now ready to share one of my best kept secrets with you (of course I needed time to test my theory etc so do forgive me for keeping it for so long!) and what’s even better is that you can start to test this theory yourself starting tonight! That’s right, you can try it tonight so prepare yourselves ladies because in this very short article you’re going to learn how to have naturally long eyelashes…

What you need:

Cotton bud

Olive oil

What to do:

Every night before I go to bed, I take a cotton bud and dip it into a bit of olive oil then gently rub it on my eyelashes, after a couple of weeks I started to notice that my eyelashes started to get longer, even to a stage where I didn’t need  to wear mascara on a regular basis to make them stand out (of course I still wear it to add to the effect so now my eyelashes look even longer with mascara)

It’s that simple!

Generally olive oil has a nourishing affect when used on our skin or our hair, hence why it is often used for home made hair growth treatments or home made facials so it’s beyond me how we often forget to treat our eyelashes! At the end of the day it is hair, so no wonder it has the same effect!

Precaution:

You may wake up with puffy eyes if you put on too much olive oil, so make sure you avoid putting loads on your poor eyelashes! (we’re trying to better the situation, not make it worse)

I’m excited to hear if any of you try this at home! It’s worth a try, after all, what’s the worse that could happen?

P.S. Don’t forget to subscribe to this blog to be in a chance to take part of my free giveaway! If you’re using any products to grow your eyelashes, feel free to leave any comments below 🙂

Twitter   Facebook   Instagram

Posted on August 8, 2013

How to make a lip scrub

D.I.Y/ How To/ lips/ Natural beauty

diy lip scrub

I don’t think I stand alone when I say that there’s nothing better than a good D.I.Y that takes no longer than a minute to put together! So for this weeks second post, I thought I’d show you all how to make a lip scrub at home!

Why should you use a lip scrub?

A lip scrub is one of the things that you could use to exfoliate your lips! If you’d like, you could simply brush your lips with a tooth brush after brushing your teeth, but if you’d like to make your beauty routine a bit interesting, you could go on ahead and use this recipe to make your own lip scrub at home!

What you need to make a lip scrub:

1. 1 tbs  Olive oil

2. 1 tbs Honey

3. 2-3 tbs Sugar

4. A clean bowl and spoon

5. Damp face towel

6. Empty jar (optional)

7. Your beautiful lips!

How to put the lip scrub together:

1. Put the Olive oil, honey and sugar into a bowl.

2. Mix the ingredients until you get a pasty mixture as pictured below

how-to-make-a-lip-scrub

3. Using your index finger rub some of the mixture onto your lips for about 30 seconds.

You should already feel a difference at this stage!

4. Using your towel, wipe your lips and repeat the process this time rubbing it for a lot longer (1 -2 mins)

5. Again, use your towel to remove the lip scrub and voila!

6. If you’re a bit of a hoarder, you could put the rest of the lip scrub into an empty jar but make sure you get the full use of it, if not, it will only get hard and go to waste.

Note: Regularly exfoliating your lips with a lip scrub helps remove old and dead skin cells on your lips so over time your lips will become more moist and naturally plump

(Vote no to dry and chapped lips!)

P.S. Don’t forget to subscribe to this blog to be in a chance to take part of my free giveaway! Feel free to leave any comments below 🙂

Twitter   Facebook   Instagram

Posted on August 5, 2013

Makeup Tips: 5 Quick Beauty Fixes

Beauty

make up fixes

We’ve all been in a situation where we think we’re nearly finished with our makeup, then all of a sudden one of our cheeky lashes manages to make it’s way into our eyes…… not the best feeling in the world is it?

As much as it irritates me, I’ve managed to find a good trick to get rid of the little bugger without completely ruining my look! So I’m going to let you in on my little secret while sharing 5 quick beauty fixes with you so I hope these makeup tips will make your life that much easier!

1. When your mascara smudges before you go through the front door, consider yourself lucky because that could have gone unnoticed! For a quick beauty fix, just dip one end of your cotton bud into your moisturizer and gently remove the smudge from your face! Then use the other side of the cotton bud to get rid of any excess moisturizer.

2. If you’ve gone a bit heavy with the blusher, mix a bit of your moisturizer with your foundation (on the back of your hand) then lightly blend it onto your cheeks if you’ve used a cream blush, if not, lightly go over your cheeks with fixing powder (or translucent powder)

3. To prevent creamy eye shadow from creasing, lightly brush some translucent powder on your eyes after you’ve applied the cream shadow (this translucent powder really is a saving grace!)

4. If you want to prevent your eyeliner from smudging, apply the same-color eye shadow over the liner. Applying eye shadow on top on your liquid or gel liner will seal your eyeliner so that it will last longer without smudging, this is my favorite makeup tip!

and now for the one we’ve been waiting for…….

5. If your eye lash gets into your eye after you’ve applied your eye makeup, DO NOT panic!! Follow these simple guidelines:

-Wash and dry your hands so you can be sure that their clean.

-Open your eyes wide until you’ve spotted the lash.

-Once spotted, move the lash to the inner corner of your eye lid.

-Let the corner of a clean square of tissue slowly touch the lash and  if you do it right, you will witness some sort of magnet affect with the two!

This has always worked for me and because the tissue is thin so it isn’t too uncomfortable! just make sure you don’t use too much tissue, because if you do, that might get stuck in your eye and you will be left with two problems rather than one!

What are your quick beauty fixes and favorite makeup tips? Would love to get some feedback on what you find works/ doesn’t work for you so feel free to comment below! Thanks for reading 🙂

P.S. Don’t forget to subscribe to this blog to be in a chance to take part of my free giveaway!

Twitter   Facebook   Instagram

Related Posts

  • 37
    The first thing that springs to mind for a Valentine's Day look is the red lip: a defined and sultry red lip. But what comes after that? Not a lot of people get that far! When it comes to Valentines Day makeup, your look should be three things: subtle, but…
    Tags: eye, liner, makeup, foundation, tips, shadow, free, giveaway, corner, blusher
Posted on July 30, 2013

Bare Minerals Marvelous Moxie: First Finish

Appearance/ Beauty/ maintenance/ product review

bare minerals marvelous moxie finish first best nude lipstick

Those of you who know me would know that I tend to go through a series of phases. Ever since my matte phase started dying on me I slowly started building an obsession with something new (I guess it’s true what they say ‘the only way to get rid of one obsession is to find another’) and in this case, my new obsession is with nude lipstick.

Of course it started off with nude nails (first indication of obsession), but as always I managed to find a way to get my hands on a nude lipstick that really blew me away: Bare Minerals Marvelous Moxie: Finish First (19e)

This lippy really does glide on like a dream! So those of you who suffer from chapped lips will be more than happy to know that this product is very forgiving !

bare minerals marvelous moxie finish first best nude lipstick enhance whats yours belle f beauty

What I Iove:

1.This nude lipstick has a plumping effect so it gives you a nice and healthy pout (operating word being healthy)

2. It has a creamy texture it’s almost like putting butter on your lips!

3.It gives you a rich satin finish (you really  can’t go wrong)

4.It’s a nude lipstick that applies evenly

5. It’s long wearing so you don’t have to retouch too many times with this

6. It’s great for a day-time look and night-time look so you could get the best wear out of it

and last but not least……

It smells amazing!

If that isn’t enough for you to want one of your own, then I really don’t know what is! Even I have to admit that I’m glad they didn’t have the nude lipstick I was looking for in MAC the day I bought this, otherwise I would not have discovered this fabulous lippy at all.

Have you tried anything from the new Bare Minerals Marvelous Moxie Lip collection? If not, don’t you worry because you have loads to choose from! Bare Escentuals have recently released 20 new lippies, 10 liners, and 4 brand new Moxie lip glosses so I cannot wait to get my hands on more!

Nude lipstick: Are you a fan or a foe?

Bare minerals moxie lipstick finish first before and after

Twitter      Instagram    Facebook

 NOTE: I’m doing a giveaway after 100 subscribers, so remember to subscribe to this blog! Just type in your email on the top right of the side bar…. Thanks for reading 🙂


Back to top
%d bloggers like this: