Browsing Tag

Bobbi Brown

Posted on March 7, 2015

The ins and outs of using blusher

Makeup

the ins and outs of blusher

Photo credit

When it comes to putting on blusher, some people get it right but a whole lot of people get it wrong. It’s almost like the ones who get it wrong put very little thought into the colour and formula of their blusher and then simply dab the product onto their face in hopes that things will miraculously work out well for them –even though it rarely ever does.

Being smart about applying blush can save you some money but most importantly, it can save you a lot of time. Finding a skin-type appropriate formula and a colour that will make you look the most natural will help make the whole blusher application process much easier.

So which formulas do I get to choose from?

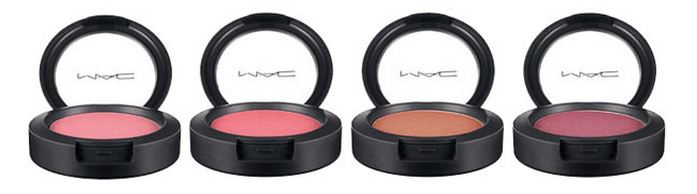
Power – this is probably one of the easiest formulas out there to use, especially since it works well on all skin tones.

Cream – this type goes on very smoothly and leaves a dewy finish. They work best for dry-skin types.

Cream/Powder – this goes on like cream but then dries to a long-lasting powder finish. It is best suited for normal skin-types.

Gel – this gives a sheer colour, but since blending gel blushers can be a bit trickier, they work the best when you have smooth skin.

Cheek Tints – these can be a bit like gel blush. They give a stained look, but can be very difficult to blend. Cheek tints work best with smooth skin.

Chubby Pencils – these are pretty easy to blend and work well with normal to dry skin types.

Pot Rouge – these are usually packaged in little pots and provide a sheer stain on the cheeks. They are suited for normal to dry skin types.

As you can see, blushers come in different shapes or forms and there is usually something out there for everyone. Once you have the right formula, choosing the right colour should be your next step.

mac blushers

The pinch test

This is probably one of the best ways to find a blusher that will make you look the most natural. All you have to do is pinch one of your cheeks and then find a shade that is closest to the colour of your cheek when you pinch (it works all the time). Hold up a few different shades near your face until you find the right colour.

Applying blusher

Once you have both your formula and colour sorted, you can think about the whole application process. When applying blusher, it is always a good idea to use as little as possible at first and then build it up gradually. If using powder blush, start closer in the apples of the cheeks and brush outward toward the hairline and then down to soften the edges. Your face should look balanced and natural. If you need to soften any heavy application then you can use a powder puff!

A tip from the professionals:

Using two shades of blush, apply your natural colour and then add a pop of a brighter colour on top. The natural shade looks great at first, but often fades easily. The brighter shade alone is often great for the evening, but too much of a contrast for everyday. This layering technique offers natural brightness.

– Bobbi Brown

Hope you found this useful, let me know if you think I’m missing anything! 🙂

Twitter   Facebook   Instagram

Posted on October 8, 2014

Foundation VS concealer: which comes first?

Tips

foundation vs concealer

At this stage, it’s probably been drilled into your head that concealer has to come before foundation. But, the truth of the matter is that it all really comes down to how much coverage you want and what exactly it is you want to achieve (besides flawless looking skin).

Some people only have a few blemishes, meaning they mightn’t require any concealer at all because with non-serious cases, foundation gives just enough coverage to hide unwanted marks. However, others feel that they need concealer to achieve flawless looking skin – or at least to fake a flawless base!

The debate between foundation and concealer application is ongoing and it even brings about conflicting answers from professional makeup artists.  This has lead me to believe that it really comes down to personal choice.

Here’s why you might want to apply foundation first:

If your face feels naked without foundation, apply it first. Then dot concealer only where you need extra coverage.

Cynde Watson, founder of Color by Cynde Watson

Here’s why you might like to start off with concealer:

If you don’t like to wear a full face of foundation, apply concealer first to the areas that need full coverage. Then you might find you don’t need foundation at all—or need only a little bit to even out skin tone and make your skin look flawless.

Bobbi Brown, founder of Bobbi Brown Cosmetics

I normally apply foundation first and then go over a few areas with some concealer afterwards.  Which do you start off with? Feel free to share your thoughts below!

Twitter   Facebook   Instagram

Posted on October 2, 2013

How to clean your makeup brushes

How To/ maintenance

how to clean makeup brushes

There’s nothing worse than using dirty makeup brushes on your face, first of all it isn’t the most hygienic thing in the world, and secondly you are basically asking for your skin to be terribly irritated (not exactly the best way to Enhance What’s Yours...)

The above picture is what you should avoid doing. You should avoid immersing the head of your makeup brushes into water – pretty sure Bobbi Brown would back me up on that. Since the hairs on the makeup brushes are glued to the base, even the most expensive brushes will come apart if you do this so you should really avoid soaking your makeup brushes into water.

So how do you clean your makeup brushes then?

how to clean makeup brushes

  1. Drop  a very gentle non-alcoholic soap (preferably baby shampoo) into the palm of your hand
  2. Swirl the bristles of your makeup brush around your palm after having wet the brush.
  3. Once covered in soap, rinse thoroughly until all the soap residue is gone.
  4. Squeeze out any excess moisture out of the bristles.
  5. To finish up, reshape the brush head with your fingers.

Drying Station: Let your makeup brushes dry flat and hanging off the edge of a counter so the bristles stay into perfect shape.

Note: When you’re drying your makeup brushes do NOT dry them in an upright position, or else the water settles into the glue which holds the bristles together at the base of each brush.

A deep cleaning of your makeup brushes is recommended between once a week or once a month- A bit of a stretch I know, but if you use your brushed regularly then once every 3 weeks. If you don’t use them as often, then you’re not required to wash them as often.

If once a month is far too long for you (or if you just want to be super hygienic), you can give your makeup brushes a quick clean cleaning in between deep washes.

For a quick clean just follow  the steps below:

how to clean makeup brushes

  1. 1. Spray a makeup brush cleaner on tissue
  2. 2. Swipe it around and add a few more spritz
  3. 3. Swipe it up and fourth until all the residues are removed

I’d be lying if I said I did this every time I finished using my brushes, but it’s something I do immediately if my sister used my makeup brush because she forgot hers. Other than that a good clean every 2 weeks just about does it for me!

Hope you’ll make use of this quick lesson, feel free to leave comments below!

Don’t forget to subscribe to Enhance What’s Yours 

Twitter     Facebook     Instagram

Related Posts

  • 30
    Photo credit Yesterday, I decided that a bit of pampering was in order. I put on some relaxing music and started off by cleansing and exfoliating my face and then, I went on to steam it. This was followed by a not so pampering experience of peeling  pore strips off my whole…
    Tags: enhance, what's, quick, brush, enhancewhatsyours.com
Posted on April 20, 2013

Bobbi Brown, Extreme Party Mascara or Rimmel, Scandel Eyes?

Eyes/ product review

bobbi brown extreme party mascara

A lot of you may think that the answer to this is a given, but believe me, you will soon be very surprised when I give you my feedback on each mascara. I know I know, how dare I compare Rimmel to this world class makeup line, I mean how could I even put them both in the same sentence right?

Well the reason why I chose these two in particular is because  one  is my daily mascara while the other I use for nights out and you might be a bit shocked when I tell you which.rimmel scandel eyes mascara

When I first got Bobbi Brown, Extreme Party Mascara I was more than excited to use it for a night out, I mean let’s face it, the name ‘Extreme Party Mascara’ really does make you want to just let your hair down and get all dolled up! So that’s exactly what I did!

To my surprise, and I feel almost guilty to have to say this, but after a few hours of applying this mascara, my lashes were flat. My lashes were lifeless. And a lot of the product had  smeared off leaving flakes under my eyes.

The Rimmel, Scandel Eyes which I initially bought for an everyday use really took me by surprise as it did absolute wonders for my eyes! I instantly saw a difference in my lashes after applying this mascara as my lashes were fuller,longer and the product stayed put until I washed it off.

So which should you choose?

Honestly, it all comes down to what exactly you want your mascara to do I mean Extreme Party is a misleading name because it’s pretty much like any typical mascara. So if you’re looking for a natural curl and nothing too dramatic, I’d recommend you get something cheap and cheerful in your local chemist because Bobbi Brown, Extreme Party Mascara isn’t worth the money for it’s performance!

If you want something that adds extra length/volume to your lashes, something that  really IS waterproof and doesn’t come off until you want it to, then go for Rimmel Scandel Eyes! I know the packaging isn’t great and if you happen to fall asleep with this mascara on, it will hurt, but after all it only costs about 8 euros and I think it’s priced exactly where it should be!

Have you tried these products before? If so, did you experience the same things that I did?


Facebook     Instagram   Twitter

Back to top
%d bloggers like this: