Browsing Category

maintenance

Posted on December 8, 2015

When to replace your makeup

maintenance/ Makeup

old makeup products

It’s funny how people jump so quickly to throw out foods that have past their due date, but when it comes to makeup products, they suddenly become hoarders and cling on to them as if these products were irreplaceable – something I know about all too well!

Believe it or not, the effect of using beauty products past their shelf life could be a lot more damaging than you’d think. For starters, expired products stop performing as well as they did when you first got them. But in more serious cases, they can cause irritations or infections.

Throwing out half-used makeup products can prove to be quite upsetting, but what would be even more upsetting is the eye infection you could get from using mascara that had been nesting under a pile of even older beauty products!

Here is a quick guideline for when you should start saying your goodbyes:

1. Mascara

mascara

When it comes to beauty products, mascara probably has one of the shortest shelf lives. Since the product is in a dark and wet environment, it is the perfect breeding ground for bacteria.  Expired mascara stops going on smoothly and becomes chalky and dry. One of the best ways to extend your mascara’s shelf life is to twirl the wand at every use instead of pumping it, which increases the amount of air that gets in. Toss time: every three to four months.

2. Foundation

The more you dip your brush or finger into foundation, the higher the chances of bacterial growth and possible breakouts. Foundations that have reached their expiration date can change in colour and consistency, and go on unevenly leaving you with a streaky finish. To extend the life of your foundation, store it in a cool, dry place, away from the sunlight. Liquids can last from up to six months to a year, while powders can last up to two years.

3. Eyeliner

liquid liner and gel liner

Like with mascara, bacteria can easily grow in the tube of liquid liners. Eye pencils on the other hand have a longer shelf life because they are constantly getting sharpened which forms a fresh and clean surface before each use. Toss liquid and gel liners after about three months and eye pencils can last for over a year.

4. Eyeshadow

Powder-based cosmetics have a longer shelf life because they lack water and are therefore less prone to contamination. Cream shadows on the other hand have a shorter life span and should be replaced at least once a year. If you happen to get water on pressed shadows(or any powder formulas for the matter) then they should be tossed after about six months!

5. Lipstick & Lip gloss

mac lip stick collection

Most lipsticks last for up to a year, while long-wearing formulas have an even shorter life span. As a rule of thumb, once the texture of the lipstick changes and it no longer looks creamy on the lips and is difficult to apply, then it’s time to bite the dust!  Lip gloss with a wand applicator can last for up to six months, while lip gloss in a squeeze tube can last for up to a year.

Other products like nail varnishes should be tossed after about a year or two, disposable makeup sponges should be used for no longer than a month and powder based blush or bronzer can last for up to two years!

Remember, these are just guidelines! If  the consistency of your cream starts to change, your mascara becomes dry and clumpy before month four or your nail varnish starts to turn gooey, then you know what to do with them! 🙂

Twitter   Facebook   Instagram

Related Posts

  • 10000
    When it comes to achieving a flawless makeup look, the quality of your makeup brushes is just as important as the quality of the products you use. Too often, people underestimate the power of a good makeup brush. They think any old makeup brush could do the trick when in…
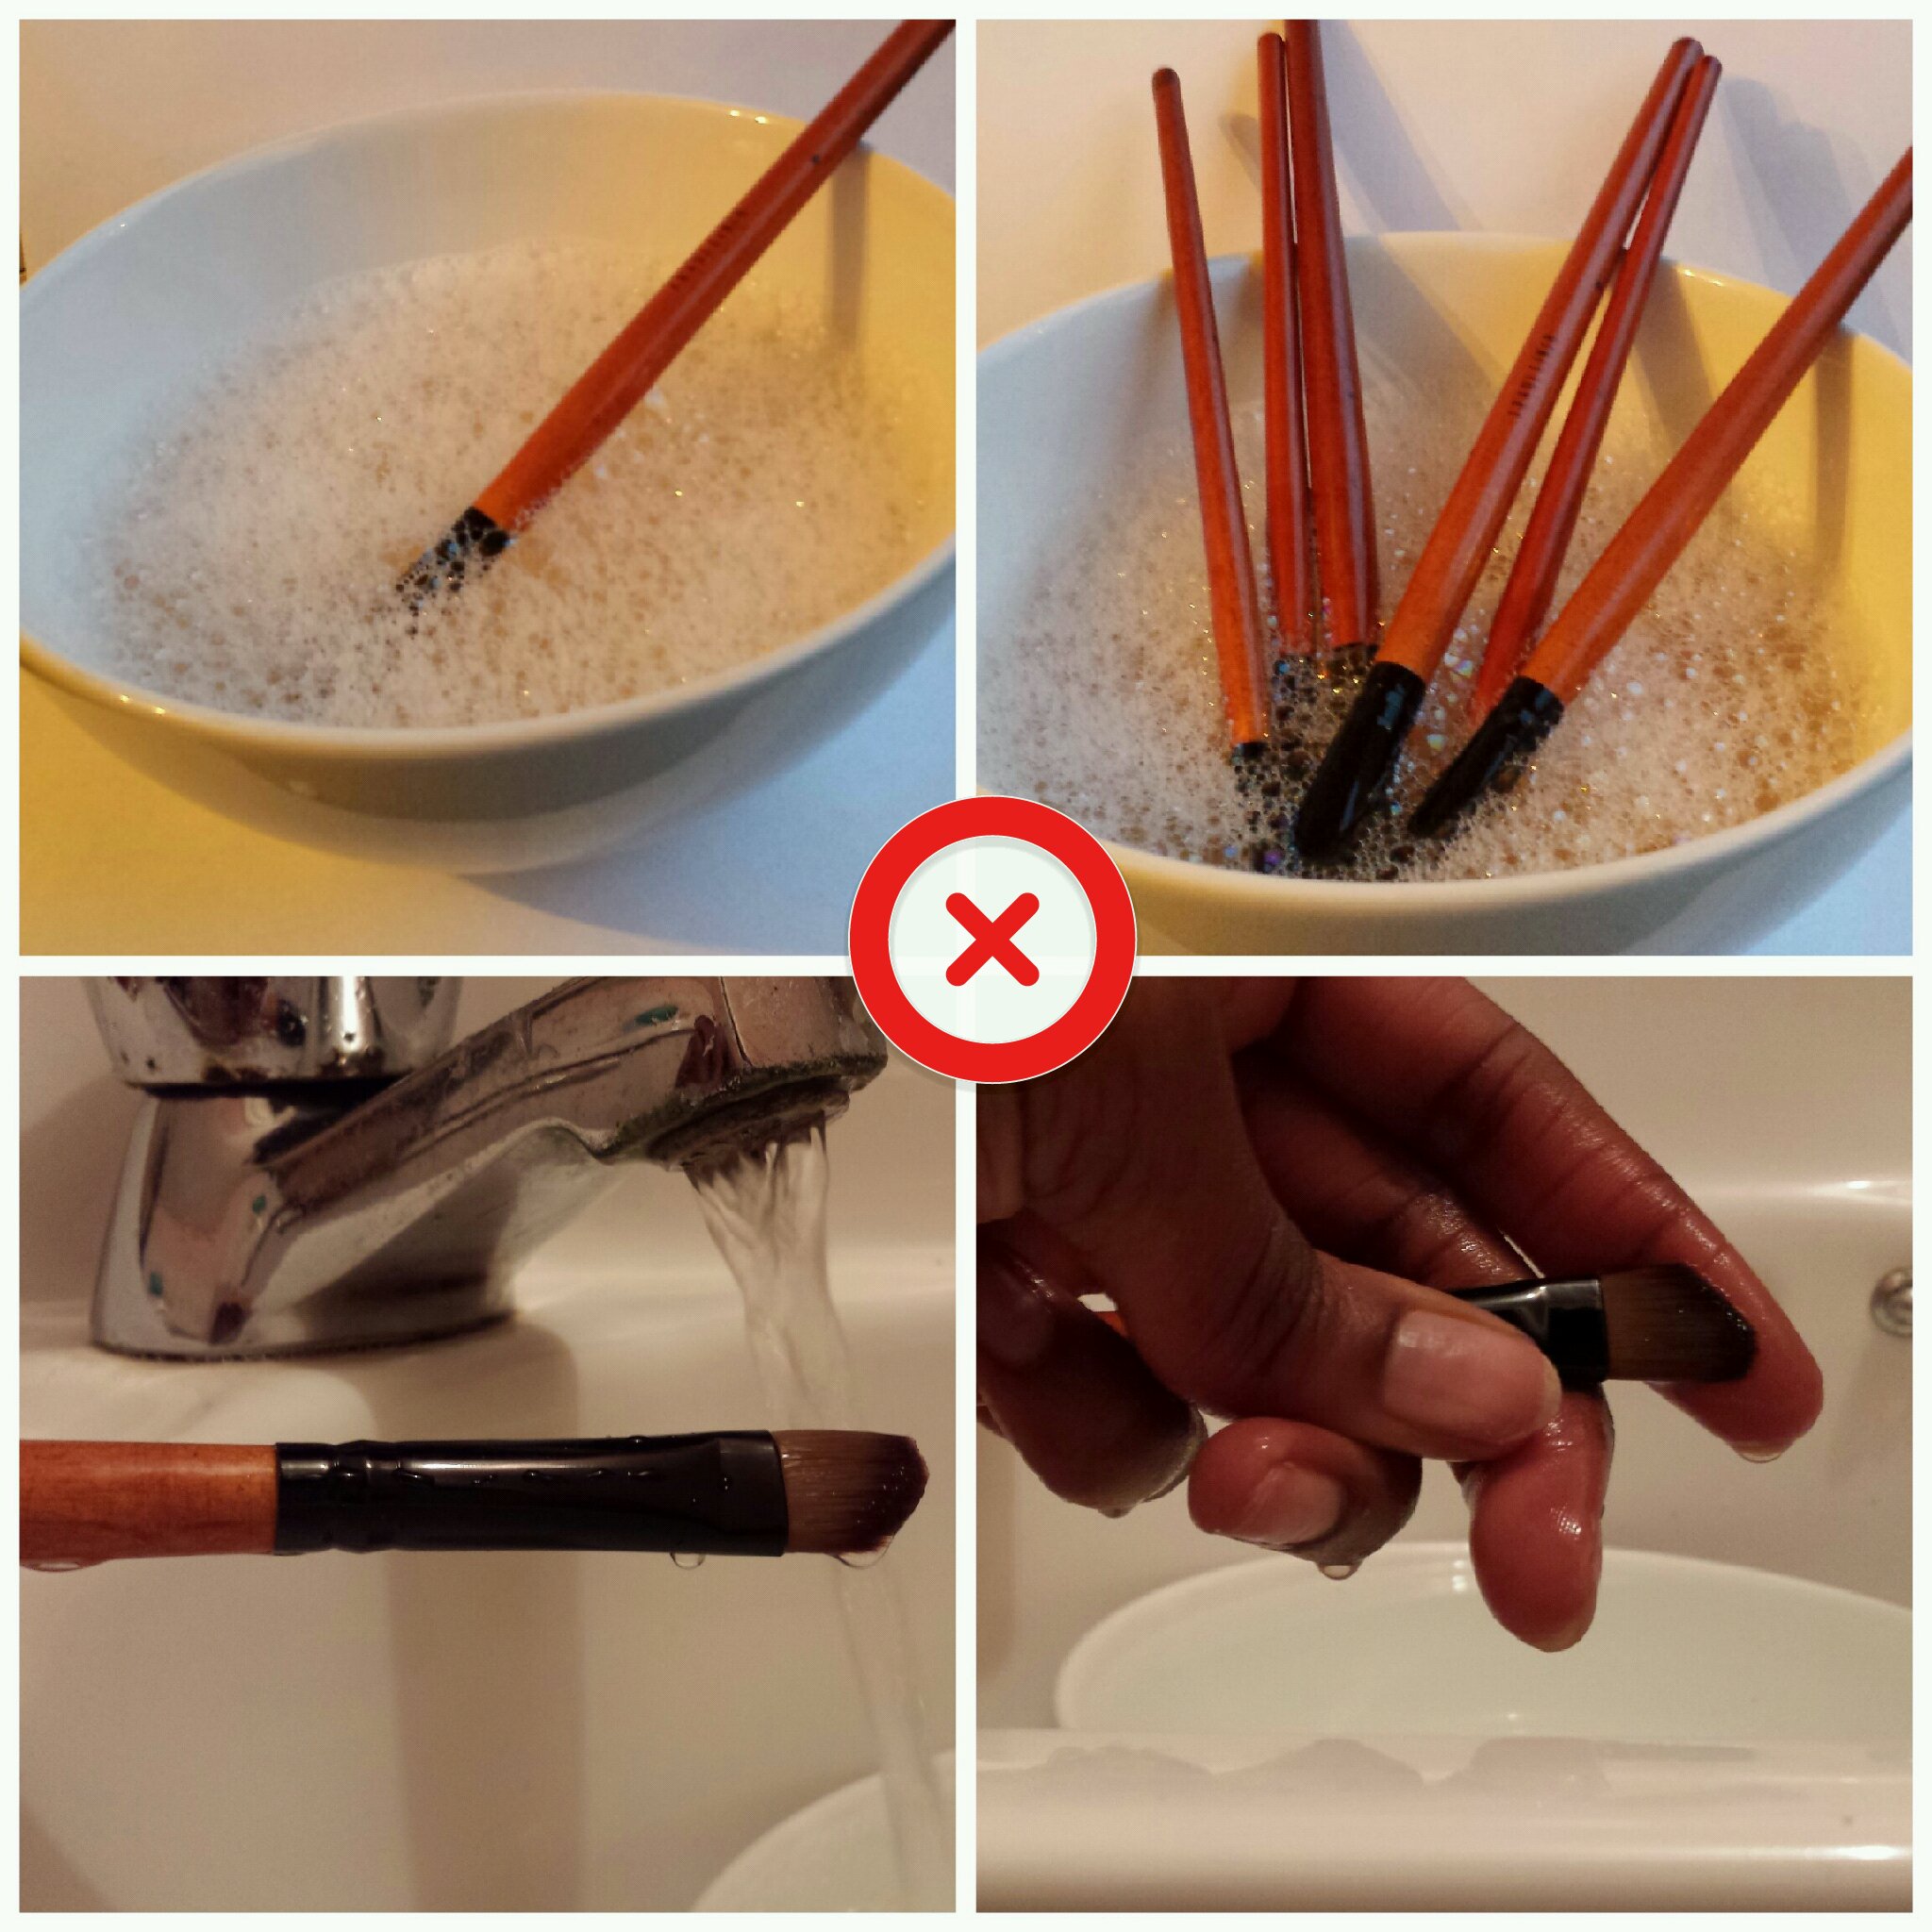
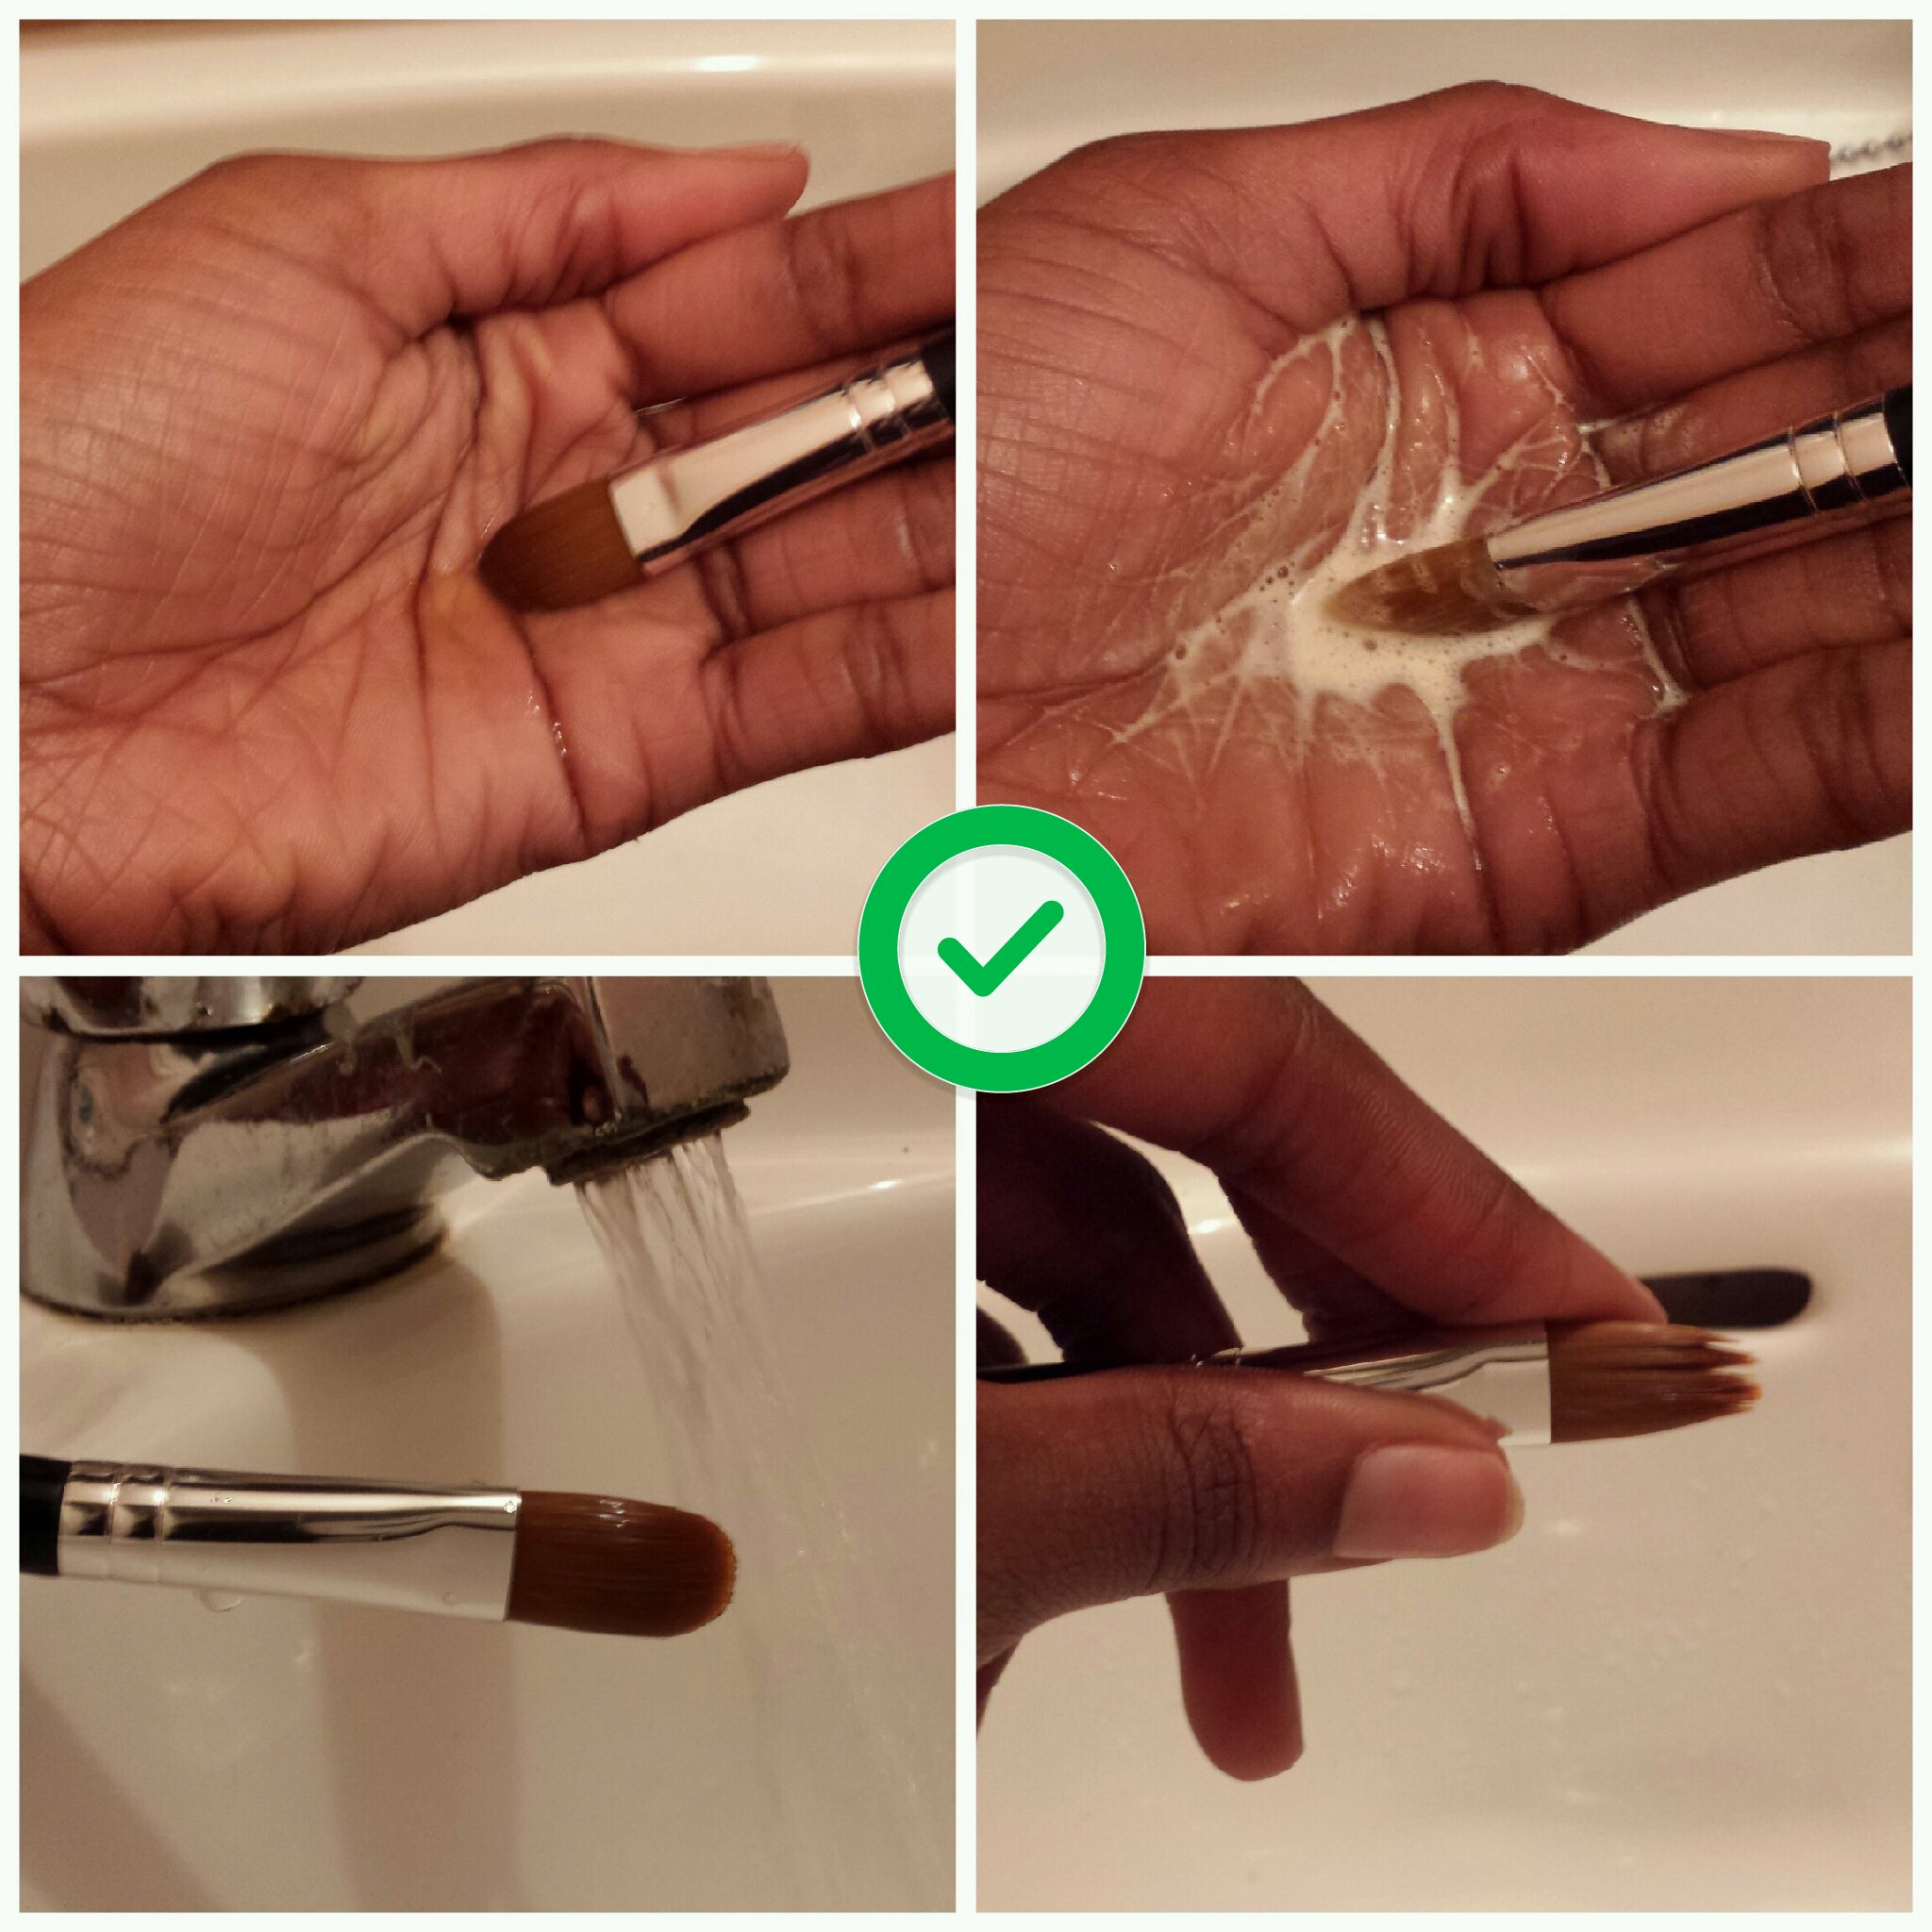
  • 10000
    There's nothing worse than using dirty makeup brushes on your face, first of all it isn't the most hygienic thing in the world, and secondly you are basically asking for your skin to be terribly irritated (not exactly the best way to Enhance What's Yours...) The above picture is what…
  • 10000
    They say it takes 21 days to form a habit: you leave mascara on your lashes today, you forget to wash your face tomorrow and before you know it, going to bed with a full face of makeup becomes a normal part of your life. Sleeping with makeup is probably one…
Posted on August 14, 2014

6 beauty tips for getting rid of dark circles

maintenance/ Natural beauty/ Tips

beauty tips

We’ve all been there: that one week where you’re overloaded with work overload and you just can’t seem to catch a break. That one time you desperately need a few hours of self-pampering – except when you finally do get the chance, you completely regret looking at your reflection in the mirror.

Yes, we’ve all been there.

Dark circles can be a total beauty nightmare and more often than not, they are usually a sign of sleep deprivation – unless of course you’ve had them all your life (our genes don’t always work in our favour).

When it comes to treating dark circles, one of the most common remedies is to cut a few slices of cucumbers and put them over your eyelids. But in severe case, cucumbers just won’t work and you will have to try a few other things to conquer this beauty problem:

1. Get more sleep
Of course a full night of shut-eye won’t keep dark circles at bay, but since a lot of the times dark circles are a sign of sleep deprivation, it’s a good idea to clock in a few more hours in La La Land.

2. Drink more water
In some cases, dehydration can be the cause of dark circles. Try your best to get at least eight glasses of water each day. If you get bored of drinking normal water, you could be more adventurous and try one of these.

lemon water

3. Maybe some milk
The protein and enzymes in milk can help heal certain skin problems. Dab a bit of cotton into chilled milk and apply it over your eyelids for about 15 minutes. Do this a couple of times a week until you see results.

4. Watch your diet
Dark circles can also be a sign of a poor diet. Lay off the junk and try to eat more fresh fruit and vegetables – eventually it will shine through in your face.

5. Almond oil
Apply a few drops of almond oil around your dark circles and gently massage it in before you go to bed. This natural oil will help moisturise and lighten this part of your skin.

6. Rose water
Soak some cotton wool into rose water and apply over eyelids for 10 – 15 minutes. This will help rejuvenate the skin around your eye area, giving it a brighter appearance.

Do you have any tips for easing dark circles around the eyes? If so, feel free to share them with me!

Twitter   Facebook   Instagram

Posted on October 2, 2013

How to clean your makeup brushes

How To/ maintenance

how to clean makeup brushes

There’s nothing worse than using dirty makeup brushes on your face, first of all it isn’t the most hygienic thing in the world, and secondly you are basically asking for your skin to be terribly irritated (not exactly the best way to Enhance What’s Yours...)

The above picture is what you should avoid doing. You should avoid immersing the head of your makeup brushes into water – pretty sure Bobbi Brown would back me up on that. Since the hairs on the makeup brushes are glued to the base, even the most expensive brushes will come apart if you do this so you should really avoid soaking your makeup brushes into water.

So how do you clean your makeup brushes then?

how to clean makeup brushes

  1. Drop  a very gentle non-alcoholic soap (preferably baby shampoo) into the palm of your hand
  2. Swirl the bristles of your makeup brush around your palm after having wet the brush.
  3. Once covered in soap, rinse thoroughly until all the soap residue is gone.
  4. Squeeze out any excess moisture out of the bristles.
  5. To finish up, reshape the brush head with your fingers.

Drying Station: Let your makeup brushes dry flat and hanging off the edge of a counter so the bristles stay into perfect shape.

Note: When you’re drying your makeup brushes do NOT dry them in an upright position, or else the water settles into the glue which holds the bristles together at the base of each brush.

A deep cleaning of your makeup brushes is recommended between once a week or once a month- A bit of a stretch I know, but if you use your brushed regularly then once every 3 weeks. If you don’t use them as often, then you’re not required to wash them as often.

If once a month is far too long for you (or if you just want to be super hygienic), you can give your makeup brushes a quick clean cleaning in between deep washes.

For a quick clean just follow  the steps below:

how to clean makeup brushes

  1. 1. Spray a makeup brush cleaner on tissue
  2. 2. Swipe it around and add a few more spritz
  3. 3. Swipe it up and fourth until all the residues are removed

I’d be lying if I said I did this every time I finished using my brushes, but it’s something I do immediately if my sister used my makeup brush because she forgot hers. Other than that a good clean every 2 weeks just about does it for me!

Hope you’ll make use of this quick lesson, feel free to leave comments below!

Don’t forget to subscribe to Enhance What’s Yours 

Twitter     Facebook     Instagram

Related Posts

  • 30
    Photo credit Yesterday, I decided that a bit of pampering was in order. I put on some relaxing music and started off by cleansing and exfoliating my face and then, I went on to steam it. This was followed by a not so pampering experience of peeling  pore strips off my whole…
    Tags: enhance, what's, quick, brush, enhancewhatsyours.com
Posted on July 30, 2013

Bare Minerals Marvelous Moxie: First Finish

Appearance/ Beauty/ maintenance/ product review

bare minerals marvelous moxie finish first best nude lipstick

Those of you who know me would know that I tend to go through a series of phases. Ever since my matte phase started dying on me I slowly started building an obsession with something new (I guess it’s true what they say ‘the only way to get rid of one obsession is to find another’) and in this case, my new obsession is with nude lipstick.

Of course it started off with nude nails (first indication of obsession), but as always I managed to find a way to get my hands on a nude lipstick that really blew me away: Bare Minerals Marvelous Moxie: Finish First (19e)

This lippy really does glide on like a dream! So those of you who suffer from chapped lips will be more than happy to know that this product is very forgiving !

bare minerals marvelous moxie finish first best nude lipstick enhance whats yours belle f beauty

What I Iove:

1.This nude lipstick has a plumping effect so it gives you a nice and healthy pout (operating word being healthy)

2. It has a creamy texture it’s almost like putting butter on your lips!

3.It gives you a rich satin finish (you really  can’t go wrong)

4.It’s a nude lipstick that applies evenly

5. It’s long wearing so you don’t have to retouch too many times with this

6. It’s great for a day-time look and night-time look so you could get the best wear out of it

and last but not least……

It smells amazing!

If that isn’t enough for you to want one of your own, then I really don’t know what is! Even I have to admit that I’m glad they didn’t have the nude lipstick I was looking for in MAC the day I bought this, otherwise I would not have discovered this fabulous lippy at all.

Have you tried anything from the new Bare Minerals Marvelous Moxie Lip collection? If not, don’t you worry because you have loads to choose from! Bare Escentuals have recently released 20 new lippies, 10 liners, and 4 brand new Moxie lip glosses so I cannot wait to get my hands on more!

Nude lipstick: Are you a fan or a foe?

Bare minerals moxie lipstick finish first before and after

Twitter      Instagram    Facebook

 NOTE: I’m doing a giveaway after 100 subscribers, so remember to subscribe to this blog! Just type in your email on the top right of the side bar…. Thanks for reading 🙂


Back to top
%d bloggers like this: